Thursday, September 30, 2010

Unique Handmade Flowers

So, what makes these roses so unique. Well...they are made of fish scales. I know....uggggg and yuck...but wait...the people who make these get them from their local fishermen for free, which make them extremely affordable. After arriving home with them, they are thoroughly cleaned. Once they are cleaned the scales take (2) 24 hours baths in bleach. When dry they are colored various colors.

If you saw and touched them, you would NEVER guess what they were. They feel very much like a thin plastic. What is the best part of using them is that they are bendable, shapable and cutable. They truly are a fun medium to work with.
I took a class on how to make these roses at the egg art show I attended last week. With it came 3 full ziploc baggies of different color scales. I think there are more in these baggies than I will ever use, lol.
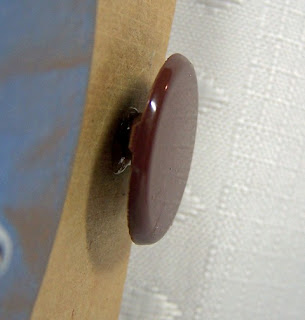
The texture and natural pattern of the scales make them perfect for flowers. When looking at them from the side you can see the texture adds a look of a really petal.

To use the flowers, all I need to do is clip the toothpick off. Glue adheres really well to these which I find to be another benefit. When using some other flowers, such as Prima, many glues just don't hold them. I usually use my glue stick and find that getting the glue on the spot I desire is quite a challenge. I will never give up using my Prisma! I do find these little flowers to be a nice change from the standard though.

I will be using these flowers on a card or project very soon and am excited to show you just how lovely they look in use.

Do you venture out of the norm when adding embellishments to your projects? If not, give it a try, you may be pleasantly surprised.

I am entering these in the Top Tip Tuesday Challenge.

Hugs,

Wednesday, September 29, 2010

A Childs Birthday

A young child's card is one thing I have very few of (well...as of today I have 1, lol). The other kind of card I am desperately lacking are masculine cards. Today, I am sharing the 1 child card I have.
Wink Wink Ink makes these adorable images. I used the sets Teddy Bear Messages and Birthday Necessities. I decied on the precolored images for this card, since, as I said previously, my week have been super busy. All I did was add some dots and swirls. I thought a small child would like a 3D type card. I made the bear using 3 layers plus the sentiment.
Playing with the images in PSE is so much fun. I did not allow for the sentiment to bend when sizing it. To compensate, I used some toothpick that I cut into small pieces.

One thing I need to practice, which really should be very easy, is adding polka dots to images. Anyone have any tips?
To make the balloons shiny, I covered them with mod podge, not wanting to wait for crystal effects to dry, such a Sandy thing, bwaa ha ha.
My grandson will be 1 year old the end of December so I think I will save this for him. His favorite toy is a huge teddy bear that my daughter got years ago. It must be 4 feet tall, lol. He loves to climb on it, bounce on it (forget the Johny jump up!), cuddle with it, grab its fur and pull it, rub noses with it...you name it...this bear is his favorite play buddy. I think he will love this card, if I can hold on to it until then!

Have a super day, and please don't forget the blog candy! There is only 2 days left before the lucky winner is drawn :o) Good luck to everyone.

Hugs,

Tuesday, September 28, 2010

A Tuesday Tip and Challenge

Hello everyone and thank you for stopping by today. Seeing is it is Tuesday, we have a fun Digital Tuesday Challenge for you.
This week our sponsor is the wonderful My Grafico Digital Arts and Crafts Store. We were so lucky as to be able to play with a digital set from Lindsay's Stamp Stuff called Fancy Flowers, which contains 5 stunning flowers from different angles. Lindsay has some beautiful digital sketch sets as well as line drawings, digital paper, templates and more. I hope that you have time to check them out, you will be glad you did!
This weeks challenge is to make a thank you/give thanks project. To enter the challenge all you need to do is remember the very few simple rules (well...and make a project, LOL):

You must use a Digital Image.
You may combine challenges.
It must be a new creation! It does not have to be a card, any layout or 3D project/altered media is great too!
After posting your creation to your blog or gallery,
please leave us a direct link in Mr. Linky.
If Mr Linky is not available, post your direct link in the comments section!
Link must be posted by next Monday 9PM US eastern time to be in with a chance at winning.

I decided to use the magnolia images for my card. Magnolias are one of the very few flowers I love that are not lilies. I really need to purchase more red Copics! The few I have really did not match the beauty of a  magnolia flowers color.
I have been so very busy this past week that I decided to make a clean and simple card for the challenge. Since I could not find any designer paper to match the flower, I used one of my embossing folders and went over it with a little bit of chalk, then paper piercing the layers.

I do have a quick tip for you. I've mentioned before that I used my black or gray Copic markers to outline, or go over, the white edges of  images I cut out. I stopped using them for this purpose because I have found that the ink tends to leak into the image when I do. Another reason is that I slip a lot and get lines of markers on the colored image.

I now use my Prisma color pencils. They work even better than the Copics for covering the white edges  and is erasable. Here is an example of the difference between outlining the image and leaving the edges white.
This inside flower was cut out and as you can tell, when you click on the photo, I am not very good at keeping the edges even. I did not outline this image after cutting (I must admit I forgot, LOL), which makes a perfect comparison to show you.
The outside flower I did outline using my black Prisma pencil. It really makes an unbelievable difference! It looks so much prettier and you can't tell where I cut off the images outline {wink}

I hope this little tip helps you!

I am REALLY looking forward to seeing all the Thank You/Give Thanks projects this week.
Hugs,

Saturday, September 25, 2010

Egg Art With Real Duck Egg

I went to a fantastic egg art show this past weekend with my mother. They not only had stunning egg art displayed, but they were selling lots of stuff. There were also classes to take. I had never made an egg with a scene inside, so decided to take the class which showed how to make 2 eggs.

This egg art was made with a real duck egg, There really is no paper used other than the purchased birds, which I wouldn't even try to make, lol I was so excited about it I wanted to share it with you anyway..


The branch is real also, taken from the instructors cherry tree. The ever green is also real and dried, though I do not remember is she took it from a tree in her yard. All the snow around the edges and the "floor" inside the egg is silicon, which the airport took from me (the tube was more than 3oz, sigh), and is sprinkle with glitter. The outside of the egg is also sprinkled with glitter (this I did wait to dry!)

The gold micro beads are bird seed, they have to eat after all, tee he he.
  

The egg hangs so can be used as an ornament or as home decor. As you can tell, I pulled a Sandy and did not wait for the silicone to dry, lol. One bird ended up with some snow on its head and the other on its bottom side. They are only about 3/8" so I bet they are cold!


Thank you for stopping by today. Don't forget about the blog candy :o) in the post above., there are still 6 days left!
Hugs,

Tuesday, September 21, 2010

Love For Animals

ONE FOR THE GIRLS is this weeks Digital Tuesday Challenge. I am so glad it is not one for the boys, making girly girl thing is so much easier, LOL


Our sponsor this week is the  maker of the most adorable squirrel images, Digital Stamp Oasis. The winner will get to choose (add number here) of them!!!

I usually use the sponsors images to make a card, but today is one of the quickies I had to make before leaving for Ohio. This image was super easy to color and blend on the Paper Temptress White Gold paper.


I so much wanted to use a pattern paper with this card, but looking quickly I just could not find any to match the colors. I then decided to emboss some paper with my big shot and cuttlebug folders, but the folders are to small for a 5x5 card, grrrrrrrrr. Finally I opted to use flowers and gemstones.


Don't you just love the sentiment! I am an animal lover so loved it as soon as I saw it. I also thought this image would be perfect to use with it.  I found it at the Ginger's House blog where there are loads of freebie sentiments.

I used my nesties and bigshot for the layers. The bottom layer and die cut on the right are from a set I purchased recently. It is not new, well....new to me, but it is so very pretty. I saw a wonderful way to use it in one of the Handmade Magazines and plan on trying it next week.

Hmmm. this picture won't center for me, LOL.
I am so glad that you spent a little of your time with me today. I hope you enter the Digital Tuesday Challenge, I would love to see your girly girl projects!

Hugs,

Monday, September 20, 2010

Apple Blossoms

Yes, I am still rebelling again the winter coming near, LOL. I absolutely love apple blossoms. So much so that we got 2 apple trees for the side yard just for the blooms. The apples are a plus too, wink.

I got this picture from Far Far Hill and so much wanted to use it. This really is a very quick card to make
Isn't it pretty. After printing and cutting out, I did not think that anything had to be done to make it better.

All I needed to add beside the paper and velum was some ribbon and gold outline stickers. Aren't they the greatest stickers for a paper crafter. If you have not tried them, I encourage you to do so. They give a nice embossed look without the mess, YEAH!The inside was made the same as the card front and was very quick.


Picking out the paper is always the hardest part for me. Sometimes I don't want to go into the craft room just because I know I will need to choose out papers, ha ha ha I wish I had a better way to organize them. If you have any ideas other than the plain paper in a file cabinet and the print paper stacked in a cabinet, let me know. It can be so frustrating to have to look through so many stacked papers just to find ones that will match. If I had all the paper picked out before putting this together, it would have only taken me 15-20 minus (I am a little to slow to get a 10 minute card!)

Don't forget about the blog candy. You can get your name in twice simply by telling folks about it, though it is not really necessary as every follower will be added the once.

Hugs,

Saturday, September 18, 2010

Wink! Glued To A Friend

Going away for the weekend has given me little time to play in my craft room. between babysitting my grandson and preparing to leave I have snuck in to make a couple of quickie cards.

Today I have a card using one of the precolored images from Wink Wink Ink. Beside having the most adorable images, when you purchase them you get JPG, PNG and a precolored image! I find the precolored good for helping me decide what colors to use when coloring the JPG or PNG images. Another thing they are fantastic for is making a quick card when needed.
This image is called "Falling Apart". As you can see, the precolored images are well done. You can either leave as is or add more shadowing or color in chosen areas. I decided to leave this one as is.

I used the ink to paper technique for around the image. I have not used that technique since I first started paper crafting. It was supposed to come out like star bursts but...lol.

The image is just to cute! Do you have or have had a friend that helps keeps things together in hard times? This would be a perfect image to put on a "thanks for everything" card.
Well, I am running now to finish packing. I hope you have a great weekend yourself and have a chance to pop in again. Posts will still be posted since there is the fantastic schedule choice.

Hugs...

Thursday, September 16, 2010

In My Mind It Is Still Spring, lol

The air is crisp, the apples are ready to pick, the air conditioner out and the days are getting shorter. I figure if I don't give in to quickly it will last longer and winter will hold off, LOL

I made this spring scene as a representative of my rebellion, ha ha ha


I used 3 digital stamps from Tiffany's Doodles. It is so much fun to combine images without having to use masks. I was never very good at them. I know that masking is supposed to be easy but it seemed no matter what I did, the ink would leak under the mask and ruin the picture.

Isn't the grass fantastic! It is the first time I saw a digi grass stamp. The set has 4 different grass images. I know I am going to use it often. I bet I will even use them in winder scenes...ha ha ha...rebellious remember!


Again I used the awesome shimmery paper from Paper Temptress. I wish I could tell you exactly which kind, but I somehow got them mixed up. I guess it is time to reorganize my craft room and file cabinet. Oh...the fun of it, bwaaaa ha ha. Well, actually, once I get started I know it will be fun as I am certain to find many things I forgot I even had. It will be like a really super crafting (egg) hunt.

This picture shows how pretty the paper is to a point. Just like everything else, the photo really does not capture exact details, nothing like real life.


Rubber stamping comes out so pretty on this paper. I just love it. It is perfect for scenes too, instead of adding glimmer mist, pearl-ex or similar products. So much faster and with better results.

Well, I will be out of state (NH) for from Fri-Mon for an egg art show (Ohio). I am attending with my mother and will see a friend I met last year. She is teaching a class which I am thrilled to take. There will still be posts since I can pre-schedule...so I hope you have time to stop by during your weekend.

Don't forget about the blog candy if you are not a follower yet (would love to have you!) and my current followers too :o)

{{{Hugs}}}

Wednesday, September 15, 2010

Lots Of Pictures and Blog Candy!

Not to long ago I joined a Yahoo group for Teabag Folding. It is a very different way to transform paper. For me, a bit challenging, but loads of fun.

I learned a new fold yesterday and made a card using paper stitching, paper piercing and yes! rubber stamping (inside sentiment).
Doesn't it give a nice but different twist to a card? Here is a closeup of the medallion made with the fold.

I wanted to add some shimmer to go with this stunning paper I used from Paper Temptress. I tried some liquid pearls, but when they dried the dots were flat. They also lost any shimmer that was supposed to be there. To remedy that, I added more liquid pearls and immediately covered with some Stampin' Up Dazzling Diamonds (the absolute prettiest glitter I have ever used).

In this photo you can also see the new stitch I learned for the paper stitching. This was so quick and easy to do, kind of like a back stitch.

I really like when the inside matches the outside of a card. This card made that easy, just paper pierced the stitching pattern which still leaves plenty of room for a personal note.
I wanted to show you how the beauty of this paper shows right through the stamping. One of my favorite ink to use it Brilliance, but no need to with this paper. You can click on the photo to get a really good look at it.
Well, I kept my post kind of short so I could bring you the blog candy I promised yesterday :o) Now, it is not a lot (at this point anyway, but not promises, LOL) I hope you like it.

Up for grabs are 2, yup, 2 rubber images from the now closed down Cornish Heritage Farm. So if you were not lucky enough to get in on the clearance deals, this candy is for you.


This stamp is from the Saturday Evening Post series called Little Piano Girl.


Now I am sure every one recognises this one. It is a Thomas Kinkade rubber stamp. CHF has the exclusive right to make these. I have never heard of them being available elsewhere. It is sure to become a collector item. This particular one is called Graceland. Are you a fan of Elvis? If so, this is a double treat for you.

All you have to do to enter is: Be a Follower. That is it! I have been stuck on 44 followers and would love to hit 45, though 50 would be great. (I promise not to let my head swell as 44 is more than I ever thought I would get)

Do you want to get your name in twice? You can by doing 2 things:
1. Share this on your blog, maybe even add the picture to your side bar from the sticky post I will be adding tonight.
2. Then leave me a comment in THAT TOP POST (the sticky that I am going to add) so I will know to put your name in 2 times.

Winner will be chosen by Random.com (or is it org.?)

The candy will be up for grabs until the end of the month. The winner will be posted on October 1st. 

Pretty easy huh?!?!

Thanks for stopping by today and good luck to my current followers and any new followers that may join in!

Hugs,

Tuesday, September 14, 2010

A Note To Self....

...make a post for the Digital Tuesday Challenge on Tuesday! Well, I remembered, LOL. Welcome to this weeks Digital Tuesday Challenge.


This weeks sponsor is Dustin Pike at Doodle Dragon Studios.

One SUPER lucky winner will get to choose 3 of his awesome images!!! Three!!! WOW

The challenge? Make something that is SPORT RELATED.

While I was contemplating what to make, I decided one thing...I will not cave in to football season. Yup, I am NOT a fan of football (to put it mildly)
Are you one of the many that needs to constantly write notes to yourself? I am! I have more notes floating around on my computer desk, that I am surprised I don't loose some of them. Then a couple of weeks ago, Paul gave me a wonderful leather spiral notebook. I love spiral bound, so much easier to use. Now I have a snazzy place to keep all my notes in one place.

I was thinking about all the kids going back to school and decided they need a notebook too. The ones for writing homework in do not have ample space IMHO, LOL. So I pulled out a spiral notebook I bought for $1 at one of the big box craft stores.

Anyway.....I used one of the adorable and free (yeah!) digi stamps from Sliekje's Digi Stamps.
I picture this little guy heading for the skate board park near his home where skate boarding is definitely considered a sport!
For a closure I used a large eyelet and brad from a tutorial I found  here. What a super cool idea she came up with. All I did was attach them using my E6000 glue. I don't think that even the little boy I give this to will be able to knock t off! I do not have the type of pony tail elastic she used in the tutorial. Therefore I used some of Stampin' Up's elastic cord, which I glued to the inside back cover, to wrap around the closure.  This SU elastic is quite thin though, so I am thinking that on my next shopping trip I will pick up a package and replace the thin cord.

Well, looks like I am super chatty today so I think I will tell you a secret. Some time tomorrow I will be posting some blog candy. What I have I am sure everyone will like! Not only that, it will be super easy to enter into the drawing. Double YEAH! So peek in tomorrows and see what I have in store, OK

Hugs,