Thursday, December 31, 2009

Delightful Bear

I would like to take this time to thank all the wonderful women who left comments about my Grandson Camden Riley. Thank you all for the congrats and well wishes!

Designed2delights' blog Delightful Inspirations has such an inspiring challenges. Not only that, but she gives away a free digi image every time you participate! She has plenty for sale also. Her images are so adorable and versatile, just the type of stamp that is worth every penny!

Here is a card made with her last free digi. This Bear is so adorable, and of course, it is perfect for valentines day. I can see it being used any day, though, as we tell our love one how much we love them every day of the year :o)

4 layers bear edited

I love how he is made perfectly to layer. I decided that 4 layers would look just right.

4 layers bear side view edited 4 layers bear close up editedI used a few pearls and crystals to dress up the card without distracting from the main focal point. I used my own writing for the heart.

I must say I am starting to love digi's more that rubber stamp {{{shocked smiley goes here, LOL}}}

I use the Paper Temptress white paper which goes through my printer perfectly. Also, the ink dries well, so no heat setting. I have read that it is often the type of ink that one has in their printer, but I have had digis that refuse to dry with other papers. Heavier weight papers tend to get stuck in the printer at the end also.

I would like to add that, as you can see, the copics work magnificently on this paper also, with no smudging at all!!!

Do you like to layer images? If so, this site as well as Fred She Said, are worth checking out!  

After checking them out, leave a comment and let me know what you think. I would love to see the creations you come up with using these wonderful images.

Have a happy and blessed New Years Eve and first day of the new yeat!!!

hugs, Sandy O
  

Fred's Candle

WOW, 2 posts in one day, LOL

I made a card for a few challenges, and some of them are due today...YIKES...so I am posting the card now.

The challenges I made this for are:

Stampin' B's: Use a candle image

Pile it on: Anything digital

Stamp Something: Holiday something

Craft Creations Challenges: Sparkle, glitter and bling

I used another of the beautiful Fred She Said digital images on Paper Temptress paper.

Candle digi front

Instead of layering, I decided to but parts of the leaves and flower with my craft knife, I then bent the paper so that it would give dimension. I then colored the back side and edges of the leaves and flower so the color would match the outside instead of the white from the card stock. Next I cute the flower and leaves from another image and glued it onto the back, lining up the flower and leaves. This prevented the inside from being white also.

Here is a close up.

Candle digi close up

You can click on the photo to get an even better look. I embossed parts with gold, other parts I used my Sakura glitter gel pans. I embossing the outer part of the flame and put glitter on the inside. I also used crystal effects on the white part of the candle, as well as the dripping parts.

I embossed the outer edges of the nestability cut outs to match the image. Finally adding ribbon and a small bow on the bottom. I adhered the top layer with the candle image on it with dimensionals.

Here is a peek at the inside.

Candle digi inside top Candle digi inside I am hoping to make a tutorial on how I did the flower next time I do this technique.

Thank you for stopping by and reading a 2nd post, LOL


Happy New Year, I hope you night is wonderful and that your year will start off with blessings.

Sandy O


Tuesday, December 22, 2009

Ornaments galore

WOW, only 3 days until Christmas. Hard to believe that it is upon us and 2009 is almost over! As I wrote about in this post, we will be celebrating Christmas in January. Therefore, we decided to put up the tree Christmas day, LOL.

I made some ornament this year to hang on this tree during our unusual holiday season. These ornament will always remind me of the unusual but truly blessed Christmas of 2009 (2010).

Bird ornament 1 Blue snowbird ornament


   Pointsetta round ornament

You can click on any of the photos to see more detail.

Dragonfly ornament

A few are unusual for a Christmas tree, the dragonfly, butterfly and birds. They certainly represent Christmas this year, LOL.

I made these by adding about 20 drops of Stampin' Up re-inkers inside, swirled around until the inside was covered, then put upside down over a paper cup to let the excess drip out.

I then added some fine glitter (I found the chunky does not give good coverage), covered the hole with my thumb and shook until the inside was completely covered. Finally shaking the excess glitter out and let dry a bit before replacing the top.


Butterfly ornament I used rub-ons I found in the home decor section of the big box craft store. These are really thick rub-ons and difficult to adhere. I would definitely suggest using good quality glass ornaments as the cheaper ones broke in my hand as I rubbed. This was the most difficult part of the process, UNTIL...I found that heating the bulb first with my heat gun helps the rub-on adhere quicker and easier. If there was a stubborn section, I simply heated that section and voila...no problem.

These will make a lovely last minute gift or a gift for folks like the mailman, UPS guy...we love our UPS guy right, LOL, hairdresser, etc.

Have you made any home made gifts this year. I would love to hear what you have done. Perhaps using your ideas for next year {{{wink}}}

Again, thank you for stopping by my blog today! hugs, Sandy O

Sunday, December 20, 2009

A Challenging Day

Well, here in NH, just like much of the east coast, we had a snowy day. How pretty. I love the way it sparkles in the light before the plows come around. As I am not much of a TV watcher, especially during the day, I decided to do some challenges.

With the hustle and bustle of the holidays, I've been low on mojo, so have been seeking out some challenges to get my "spark" back. I have been using the site Daily Dare, which lists blogs with challenges for that particular day. It has been such a blessing to me. I like being able to choose the type of challenges I prefer, such as use a certain item challenge over a theme challenge.

Today I found a cute blog by a 10 year old stamper named Aly. She posts a sketch she made every other week. You can find the current sketch here. Though sketches are not among my favorite challenges, this one was to cute to pass up!

Flower dragonfly challenge Flower dragonfly challenge close up 
I kept the card simple since the sketch was fairly simple. I must say, I really enjoyed making this card.

The dragonfly is from the SU set Nature's Nest. The flowers are Prima.

The next card I made was actually for 2 different challenges.

You know I adore the Stampin' Sisters in Christ challenges, which are posted each Sunday.  This week, being a busy holiday week, the challenge is a sketch. I combined this challenge with the one from a site called Pile It On. I am so glad I found the Daily Dare. Through them I have found some wonderful challenge sites that I will be visiting weekly, which works out really well with some only posting every other week.

The Pile It On challenge is to use chipboard. I was torn as to what to do since chipboard is a medium that has the potential to become just about anything! I decided to combine it with the Stampin' Sisters sketch.

Armed with the 2 challenges, off I went. I was only sure of 1 thing, to use the SU butterfly big shot die with the chipboard. After cutting those cuties out, I decided to use my wonderful Jolie Chocolat paper, YUM. Of course I had to use the Paper Temptress Sparkle paper as a layer! I also used her paper as a base, such incredibley DELICIOUS paper she has!! Then the card just seemed to take on a life of it's own, LOL

Here is the final result. As always, you can click on any of these photos to get a larger picture to view more details.

Chipboard butterfly card

Chipboard butterfly card side
Chipboard butterfly card closeup
Chipboard butterfly card charm

 Isn't this little charm cute. This is not the first time I have used the shrink paper, but I have to admit I saw a blog this week where the person used this set with it. It seemed to be a good idea for this particular card. I can not remember whose site it was, so if you know, could you drop me the name in a comment? Thanks so much!

EDIT: Found the site with the tutuial for the charm. Here is the link charm.

Since just the right charm is difficult for me to find on hand (no matter how many I seem to have, LOL) I am sure I will be doing many more of this type in the future!

I would love to know what you think :o) REALLY...who doesn't like to read comments, tee he he

Thank you for stopping by my little blog on this busy week. Hugs, Sandy O


Thursday, December 17, 2009

Packaging

Today I would like to share some of the packaging I made for my home made Christmas gifts.

I love the Timeless Templates designed by Lauren Meader which are sold by Papertrey Ink. 

Two fo the templates were perfect for the gifts.

3 gift bags 2

The Around Town Tote (large)

3 gift bags
Small Around Town Tote attached to the back

3 gift boxes
Get A Handle On It  

I made the 2 template to match since they will be going to the same recipients.

These template are so easy to down load and make.

Tomorrow I will share some of the items I put in these packages.

Thanks so much for stopping by, hugs, Sandy O


Delightful Challenge

As I searched for some fun challenges to do, I happened upon the wonderful Delightful Inspiration blog/store. What a wonderful array of digital stamps she carries. If you have not jumped on the bandwagon of digi stamps, the monthly challenge on this site is a great way to start.

The monthly challenge is not only fun, but the image you need to use is given to you free! YUP...that's right...FREE. And everyone is a winner. As long as you participate, you will receive a free digi stamp the next week. Repeat the process and you will receive another free digi!! Doing this you will receive a free digi each week!

Also, if you always desired to be on a design team, this is your time. Everyone who plays is considered a member of the design team and you even will get a fun blinky for your blog! NICE. You can read all about it here.

To see all the wonderful digi stamps that you can buy...and digi stamps come to you right way with not shipping! YEAH...Check them out at Designed2Delight Digital Stamps.

Here is my entry

Digi snowman

Isn't he adorable! You can resize him and even change the color of the outlines. She has a tutorial here.

Thank you for stopping by again today, LOL...Sandy O


Tuesday, December 15, 2009

Gift Bundle

HomeDecember 15, 2009

Today I have a short post, but not a small project to share. I made this bundle for this weeks Stampin' Sisters in Christ challenge.
You can read all about the challenge here, which is based on the bible verses Matthew 6:19-20 "Do not store up for yourself treasures on earth..."
The challenge is to use up some of the crafting items we have been hoarding...which is usually accessories...bling.
For me, the first thing I thought of was the beautiful hand made chinese paper, matching swede paper and German made gold paper butterflies I purchased a LONG time ago. I would often think of using them...but...once I did, that was it...it would be gone. I would no longer have those sheets of paper since they are very difficult, if at all able to be replaced.
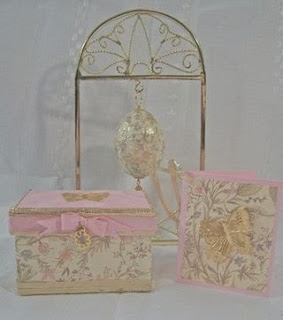
So I pulled out my treasured paper and butterflies, gold ribbon I have been saving for when just the right project came, my charm I bought at an egg craft conventions, a wonderfully thick jewelry box that I have had for so long I don't know where I got it, LOL, and my misc. other supplies.
Here are some individual pictures for you. Just click on the photo to see the detail.


Since the egg fits inside the box, I cut the remaining swede paper to cushion the bottom. Yes...it hurt, LOL

This is a 2 1/2 x 3" note card. Inside I stamped "for you" leaving lots of room for a personal note.

This is a real chicken egg shell wrapped in the same paper as the box and card. After adhering the paper, I coated it with 3 layers of mod podge. I then applied one final coat and rolled it in transparent ultra fine glitter. I purchaed this glitter from Scor-Pal when they very first opened. She no longer sells it, so I have very rarely used it.
The box seems as though it was made for the egg to fit!
Over the next few posts I will be sharing some of the projects I have completed for Christmas. Many have already been wrapped, so I think it is safe to post them. Thank you for stopping by :o) hugs,

Tuesday, December 8, 2009

Prayer Tin

Stampin' Sisters in Christ had another challenge this week. The challenge:

To make a card to let someone know you are praying for them, using images of people (men, women and/or children...angles are OK too)

I looked through all my stamps and was surprised to find I have very few stamps depicting people. The few I have did not seem to match the prayer part of the challenge, which I felt was more important than the image of a person. Perhaps the SUN could be considered the SON, who is a person though unseen to us until we are called home.

Though I won't win using this image, I thought it was appropriate to the verse.

Thomas Kinkade prayer card tin


I do not know anyone who does not know Thomas Kinkade. His paintings are magnificent. Cornish Heritage Farms has had the blessing of being able to transform these paintings into marvelous rubber stamps that, as you can see, create a marvelous image.

I colored only the sunrise, leaving the sea, mountains and cross plain. I also made rays coming from the sun with my Sukora glitter gel pen. LOVE those pens!!! This is to represent the beauty of our Lord and the dull world that we now reside in. I also used some Sparkle paper from the Paper Temptress as my goldish layer. Again larger and brighter than the black (darkness/sin of this world).

Here is a close up of the front. If you click on it to get a larger picture of it, you can see the sparkle of the paper though the shimmer of the sun rays does not show. 

Thomas Kinkade prayer card tin close up


The verse is adhered with dimensionals with a magnet attached between them. This is to hold the card closed when the tin is open.

Here is the inside of the card:

Thomas Kinkade prayer card tin inside card


I used one of Stampin' Up's thin hinged tins to make the prayer card holder, in which I attached the actual card to using Scor Tape.

Thomas Kinkade prayer card tin open


Inside the tin I put 4 prayer cards, on which I hand wrote verses about prayer. This is to represent the fact that I am praying for her. I also added 4 blank prayer cards and a fine tipped mini marker. On these she can write verses that encourage or remind her that the Lord is always with her.

Well, I hope you like the card. Perhaps I will find a digital image I can use to have a card that matches the actual challenge.

Thank you for stopping by my blog. I would love to hear what you think of this card/gift, so leave me a comment if you have the time :o)

Hugs, Sandy O
 

Friday, December 4, 2009

I Love Chocolate

Yummy, chocolate in any form is my second favorite treat. My first favorite is salad but....that takes a lot of time out of my stamping, LOL.

I have some terrific chocolate that goes perfect with stamping to share with you. It is the Chocolat paper from SEI. Yummy...the glitter paper is so pretty. I have used this paper on many cards and am in need of more, LOL

Here is my most recent card:

Cherish bookmark card

On the right of the card is a book mark that is perforated to easily remove. The ribbon (held up here with a tiny paper clip since the charm kept making the card fall, LOL) and cute charm add a really pretty touch.  Here is a close up:

Cherish bookmark card close up inside

See that glitter, it is already on the paper and butterfly sticker! Less work for me and no glitter clean up LOL. What is not showing, unless you click on the photo, is the pretty shimmery card stock I used from Paper Temptress as well as the shimmer of the Brilliance ink I used. Can you say SHIMMER!

I am so addicted to these papers that I am having a hard time using plain old card stock. It looks so flat and unfinished compared to Paper Temptress and the Chocolat.

Ha ha ha...I was just thinking how weird it is to brag about my own cards {blush} Doing a blog it does not seem so weird, BUT.....it does feels a bit odd. Do any of you have the same trouble, LOL???

And...did you see the pretty white lace! LOVE it!

I hope you liked the chocolat!

hugs

Wednesday, December 2, 2009

Another challenge

I am in love with the Stampin' Sisters challenges. This week the challenge is to make a card with a gift somewhere on it. How fun. Here is my submission for this week:

 SSCC card with gift showing

SSCC card with gift showing close up 2


SSCC card with gift showing close up

I am sure you can guess what the gift is. I was instantly reminded of the olden days when people would bring lovely smelling home made gifts to the house of friends and family which they visited. No Glade back then, LOL. What wonderful gifts I think they were.

I used the Outlines minis stamps to make the wreath and popped up the edges just a bit by gently bending them. The card is simple, like the wonderful old fashioned gift it represents.

Short and few posts until the Holidays are over. I love making home made gifts, but usually don't give them. Strange I know but I tend to think they are just not good enough for gift giving. Not this year though, for two reasons. One, I am running out of room to keep all my un-given creations and two, money is tight this year, LOL

We are going to celebrate Christmas in January this year! Don't think me weird. The reasoning is well worth the delay. My daughter Alicia is due for her first baby and our first grandchild on Dec. 20th. Since it is so close to Christmas, we really don't know if she will even be home for it. Also, Patrick is in Iraq and his 2 week trip home will be sometime in January :o) YEAH!!! and Peter is working at the power plant that day. Sigh...

Such is the dilemma of having adult children, LOL. We, Paul and I, will be celebrating the holiday on the 25th with extended family though, which is nice. 

I keep thinking of all the after Christmas sales that will help the finance this year. I so love the hunt of finding awesome deals those few days after the Holidays. I wonder if this is the start of a new family tradition with Camden's birthday so close to Christmas, tee he he. Yup, that is my family...the unusual is our norm.

Thanks for taking the time to visit on thise busy preholiday week. 

Until next time...hugs
 

Monday, November 23, 2009

Give Thanks

About 3 weeks ago, I came across a wonderful challenge site called Stamping Sisters in Christ Challenges. I am so very glad I did. The last challenge I submitted was for Operation Write Home which I wrote about in my November 11th post. I am so excited to tell you that, though I did not win that week, I was one of the 3 Shining Stars...YEAHHHHHHH! The next week, which was last week, I was not able to participate in their challenge...Boooooooo!

I have been so busy making Christmas gifts I have neglected my blog and the challenges! The sad thing is I can't post these projects until after the holidays just in case one of the "gifties" happens to check out my blog.

No Longer, though, LOL. I checked out my new favorite challenge site for this weeks challenge.  This week, for challenge #14, Galatians 6:9 is the inspiration.

"Let us not become weary in doing good,

for at the proper time we will reap a harvest

if we do not give up" (NIV)

The challenge: To stop making Christmas cards for a moment and give homage to the spirit of Thanksgiving. We could do this by making a Thanksgiving card, or a card/project expressing thanks.

I really had to think about this challenge. There are so many things for which to be thankful, which one should I focus on?

  • Salvation, spiritual provisions such as the Bible and the Holy Spirit...
  • Family, a great husband, 3 wonderful grown children which have grown into the most amazing adults, my daughters awesome husband, or our first grandchild (a boy) due to be born next month...
  • Provisions of a fantastic home, a job for which my husband can go to each day, food, clothing, cars...
  • Freedom...
  • Enough money to purchase crafting supplies, LOL,

And much, much more!!! Hmm...

After looking at my notebooks that contains photos of each stamp and stamp set...I decided this was a perfect time to use a stamp set that my SU Up Line, Sara, gave me. It is a retired set that I believe is called "Seasonal Shelves". Of course, I used the fall stamp, LOL, but the set has 4 stamps with the same shelf only decorated for each of the 4 seasons.

Here is the card:

Give thanks

I chose this stamp for a few reasons.

  • Shelf reminds me of my home
  • Plates/napkin remind me of my family gathering together around the dinner table
  • The jam/produce reminds me of the food given to us
  • Candles often have a spiritual connotation to them which reminds me of my freedom to worship my Lord and Savior
  • Wreath/flowers/bird house remind me that even the littlest of flowers or birds are important to Him. And how much more so are His children.
  • The duck reminds me of my pets, 3 dogs, which bring laughter to the house as well as reminds me of the devotion I should always show to my Savior
  • The picture itself gives me a warm, homey feeling; a comfort
  • The framed "Give Thanks" reminds me to be thankful for these things plus all the other things that come to my mind as I think on the blessings He has given me

I made the focal point in layers to represent the fact that all my blessing are multi layered (ex: husband, children, grandchildren)

 Give thanks side view  

Here you can see the dimension of the picture, the bow and little frame. Isn't it cute!

Originally it was silver, but I wanted it to be gold to represent the streets of gold I will one day walk upon, for which I am so eternally thankful for. Sooo...I pulled out my marvelous alcohol ink from Adirondack and dabbed a bit of the gold mixative on it and Voila! a gold frame to Show off the Give Thanks one more time.

As you can see, I have much to be thankful for, everyday! As I am certain you all do. For me, the hard part is to remember every moment to be thankful. So, I am thinking that perhaps I should give this card to myself, LOL

What will you be doing this coming Thursday as the US Celebrates Thanksgiving? I know that I will be thinking of all my blessings :o)

Hugs, Sandy O

Saturday, November 14, 2009

Tiny, Tiny Flowers

My favorite flower of all I have had the privilege to see, is the lily of the valley.  They are only around for a short time, but while they are here the sweet scent they send out is wonderful. They let the world know that they are here and make a big impression in their short amount of time.

Isn't that what we should do in our short time here on earth? We should leave a sweet scent (pleasant memories) every where we go. Then when our time is up, we will be remembered for the  beauty and wonderful scent we left behind. What a wonderful way to be remembered.

That makes me think of when I had an in home day care to make some money while my kids were in private school. I wanted to be home when they left in the AM, home in the afternoon and when ever they were sick. Home day care was my best option at the time.

I was truly  blessed with some wonderful families. I had the privilege to watch 2 beautiful baby girls until they were school age. I did take a year off  and the younger one came back at the end of that year. The other was in first grade by then. Her mother told me the most heart warming story about what happened when she gave the little girl the news.

Upon telling her that she was going back to Mrs. O's, she became thoughtful. After a bit, she said, "you know, I don't remember what she looks like. But I remember that she was really nice". Now, this little girl was very strong willed and the 2 little girls would often get into little spats. It took a lot of hard work on my end to deal with them in a way that would teach them to handle disputes in life the proper way. Of course, I did it in a way that the parents did at home, leaving the adorable girls with the proper "training". It warmed my heart to know that she remembered the love I showed, even when disciplining her.

That is how I want to leave this world.  People will not remember if I weighed a bit to much, if I dyed my hair to cover my gray (which I do not) or wore the expensive make up. Since it is our works that people remember, I want them to remember me as a kind and loving person.

Same with the lilies. I love how they spread and grow all on their own, every year leaving an even sweeter scent. They do not rely on others to do the work, they do it themselves by spreading and growing in their own power. They are easy going, adjusting to any situation, willing to grow in the shade or sun, in the ground or in a pot. They will help trees by keeping the soil moist for them or protect an open area from weeds. We don't have to be nice to them by fertilizing, watering and pruning before they will send out their lingering scent to us. To put it simply, they are GREAT. And...I remember them every year, looking forward to their brief visit each spring.

So for my first tiny paper flowers, I chose...YUP...you guessed it...the lily of the valley. Here is one  of the pictures I took:

Lilly of the valley 2

Look at them next to the dime! Aren't they TINY! Now these are the very first ones I have made, so please be kind to me and don't focus on any mistakes, LOL. And boy...were they hard to photograph! I hope you can see the details. It is even hard to see the details in real life, LOL

Here are some pictures taken even closer:


Lily of the valley close up
Lilly of the valley

The gummy stuff under the tericotta pot is a type of wax that holds the pot upright, since they can be knocked over so easily.

I would love to hear what you think about these. This is another of the paper crafts I will be showing you as I learn.

I hope you have a wonderful weekend and will be back to visit me on Monday. I am not sure what I will be posting, so it will be a surprise for all of us, LOL

Till then, hugs

Friday, November 13, 2009

New Technique and My Last Quick & Easy For The Week

We made it to Friday, YEAH....

This past Monday, the SCS Technique Challenge was to make Paper Towel Flowers. Different huh? I guess since paper and paper towels are both made of wood, it isn't to much different. The one I made was  a lot of fun. I think if I had a different type of paper towel it would have come out better. Viva is more cloth like than other paper towels, so scrunching the flower was just about impossible. It came out kind of pretty though.

Paper towel flower card

What do you think? I was going to run the top layer of cardstock in the big shot, but decided not to since the flower took a bit of time. This was supposed to be quick after all, LOL. I dried the paper towel with my heat gun to quicken the process.

Here is a close up of the flower.

Paper towel flower


I love the Organza Ribbon from Stamping up. Using it with Paper Temptress White Gold paper is stunning!

I hope you get to try this technique. It really is a lot of fun. I am going to try it again when I buy more paper towels.

I finally finished the TINY paper flowers I have been working on. So come back tomorrow and see these tiny creations.

Till than, hugs
 

Thursday, November 12, 2009

Operation Write Home

Yesterday I shared with you my burden for our military men/women. I also shared the organization Operation Write Home.  If you did not read yesterdays post, you may like to do so before reading this one.

Along with the Stamping Sisters in Christ Challenge #12, they have a bonus challenge to make blank cards to be sent to OWH. I went through my box of cards and chose some generic cards that I have made. I tried to find a variety of feminine, masculine and children's cards. I have mailed out the bulk of them, but have a few left to send since I ran out of envelopes!! Can you believe it. How did THAT happen???

I wanted to do something for the holidays for them also. So I made 12 blank Christmas cards to send to Candace to put in the box she will be sending OWH. Here they are:

Blank military christmas 1

Blank military christmas 2

These cards are Quick & Simple. No coloring, not bling. As anyone who knows me, bling is my thing, LOL. I love bling, I love layers. I love coloring. But for this card I only added two tiny ribbons, since the card looked to plain without adding something. I certainly did not want to cover a soldier with bling (glitter), what would the other soldiers think!!! {{{Wink}}}... Besides that was one of the guideline, no glitter! LOL

I made 6 of each color using the SU set Home For Christmas.  I thought the sentiment would be perfect. On the inside I added a layer of the very vanilla card stock with the "Merry Christmas" sentiment from the SU set "A Cardinal Christmas".

These really were quick and simple. I think the part that took the longest were the little ribbons, LOL.

That is it for today. Tomorrow I will be sharing with you my SCS Try A New Technique Challenge card. So come back tomorrow and learn a new technique with me.

Till then, hugs


Wednesday, November 11, 2009

Cards For Our Troops

Stamping Sisters In Christ posted their 12th challenge this past Sunday. The challenge is to make a card for one of our military men or women.

"The challenge for this week is to make a patriotic-themed card for a soldier and as a bonus, donate it to Operation Write Home, so that a soldier may be encouraged by your words of thanks. Write a special message of gratitude on the inside and sign your name. They will be distributed to soldiers who rarely get mail, or just need encouragement. Be sure to put your card in an envelope and write “Any Hero” on the front. For more information on how to make a card for “Any Hero” click here (http://www.owhhomefrontblog.org/2009/09/anyhero-cards-q.html)."

This is a challenge that is near and dear to my heart since I am a military mom. I currently have a Soldier, my youngest son Patrick, in Iraq at this moment. He is serving his second tour there and will not be home until June 2010. We miss him dearly and know first hand how much they appreciate blank cards to send home.

My oldest son, Peter, is a US Marine who served 1 tour in Iraq. He is home now and will be out of the marines May 2010. Our prayer is that his unit is not sent back before then. Though, once a marine always a marine!

They never think of themselves as Hero's or think that they deserve the thank you's that have come their way. They believe that all they did was their duty, kind of like "I was just doing my job". What our military men and women sometimes don't understand is that it is the very job they chose and do that we are grateful.

I do know, though, how important it is to them to know that we here at home are thinking and praying for them. That we support them even if we do not agree with the war they are fighting. That we love them and miss them and look forward to the day they are home more than anything in the world. That we morn for every one of our military who do not make it home to continue in their lives. That we feel sorrow for the loss some have suffered; lost hearing, limbs, fingers, even memory due to brain injuries.

They fight for our peace and freedom by giving up their own. Some do not live a perfectly peaceful life after being at WAR. Some learn to live with that lack of peace and move on, while others do not. They give up their freedom by submitting to their commanders even if they may get killed. They suffer with no showers, bath rooms or privacy. They don't always get to sleep in a bed, or even in comfortable night clothing. They carry heavy loads daily on their backs, loads so heavy I could not even lift them. They sleep with a gun not a pillow. They spend much of their spare time cleaning those very guns.

Yes, we see lots of pictures of them goofing off and having fun. After seeing them we may tend to think that it is not so bad for them after all. What we do not see is that those pictures represent the times that they want to remember. The rare moments that they can forget where they are and just be themselves. Sometimes we receive a powerful pictures of the reality of the war they are fighting. Of the times that photos were taken without their knowledge, showing their sacrifices, whether they be comfort or brother/sister in alms.

These young men and women, for the most part, have given up the best years of their lives. Who does not cherish the memories of their late teens and early 20s? Those who have not chosen not to make careers in the military have put their lives on hold. They can not move forward and have a hard time planning their future. They will not go to college with their peers. They will go after their peers are already graduated and have careers.  Yet, they are much more mature then those peers and always will be. 

So...now that I have written ALL THAT, LOL...I will move on to my cards. If you made it this far into the post I thank you for sticking with me!

Here is one of the very first cards I made back in 2007 that fits this challenge well.

Land of the free eagle

This is my Clean, Quick & Simple card for today. You can tell it is one of my first cards by the poor little ribbons, LOL. All different lengths and adhered kind of haphazardly. But I think it is still cute and I hope it cheers up the soldier who receives it.

Here is the card I made today. Not so quick, not so clean (one layer), not so simple.

Miltary thank you card

Isn't he the cutest little soldier! This is a stamp set I received from The Greeting Farm. They were giving away this wonderful set to those who have a family member in the military. All I had to do was send a picture of my sons in Iraq (though a picture of them at home in their uniforms would have been just as good) and I was sent this set! Talk about supporting our military families! Of course The Greeting Farm is "famous" for the Anya and Ian images. Tooo cute!

Here is a side angle of the soldier.

Miltary thank you card close up


I wanted to give him lots of dimension. I wish you could see the crystal effects I put on his lenses. It makes them so shiny! I made the yellow ribbon from the shrink sheets, stamping an image from the SU set Godspeed. The metal tag I got a long time ago on clearance in a little girl jewelry bling kit! I think it worked perfect here.

Again, I hope they like the card. I wrote the definition of the word "hero" on the inside left panel. Then I wrote a note of gratitude on the inside left panel. Added a few stickers to balance the pages and stamped the back "hand made because you are worth it".

Well, I hope you like my cards for today. I will share some of the blank cards I sent to put in the large box of all the cards they receive. This box will be sent to Operation Write Home. So please come back tomorrow.

Till then, hugs